We are working on client- and serverside libraries for easy integration of XS2A. Check them out below:
Serverside Libraries Clientside Libraries
XS2A.pay offers a payment solution. The customer uses his online banking credentials.
Optional security checks will be executed to counter fraud and other suspicious activity.
After that the transfer of a fixed amount and purpose will be sent to a predefined recipient account.
The customer authorizes the transaction with a TAN after which the bank is executing the transfer.
To use our API, make sure you have a Test-API key.
If you don't have one yet, you can grab one here.
amount to be paid,
currency_id, purpose of the payment, recipient_holder and
recipient_iban.
nategood/httpful. You have to execute composer require nategood/httpful before you are able to use it.
require 'vendor/autoload.php';

$apiKey = 'your-api-key';

$payload = [
	'amount' => 35,
	'currency_id' => 'EUR',
	'purpose' => 'Order No 123456',
	'recipient_iban' => 'DE04888888880087654321',
	'recipient_holder' => 'MyCompany Inc.',
];

$response = \Httpful\Request::post('https://api.xs2a.com/v1/payments')
	->sendsJson()
	->authenticateWith('api', $apiKey)
	->body(json_encode($payload))
	->send();

echo $response->body->transaction;
echo $response->body->wizard_session_key;
npm i @fintecsystems/xs2a-node --saveconst { XS2A } = require('@fintecsystems/xs2a-node');
const xs2a = new XS2A('your-api-key');
try {
const { wizard_session_key } = await xs2a.Pay.create({
amount: 35,
currency_id: 'EUR',
purpose: 'Order No. 123456',
recipient_iban: 'DE04888888880087654321',
recipient_holder: 'MyCompany Inc.'
});
// Use wizard_session_key as described in the next steps
} catch (e) {
// ...
}
POST /v1/payments HTTP/1.1
Host: api.xs2a.com
Content-Type: application/json
Authorization: Basic base64("api:YOUR_API_KEY_GOES_HERE")
Cache-Control: no-cache

{
	"amount": 35,
	"currency_id": "EUR",
	"purpose": "Order No. 123456",
	"recipient_iban": "DE04888888880087654321",
	"recipient_holder": "MyCompany Inc."
}
// Create a PayService Instance
PayService payService = new PayService(apiKey);
// Build your Pay Session Request
Xs2aPay pay = new Xs2aPay(
35,
CurrencyId.EUR,
"Flowers",
"Max Mustermann",
"DE04888888880087654321",
// other properties such as metadata, language ...
);
// Fire the request and get a response
WizardSessionResponse response = payService.create(pay);
System.out.println(response.getWizardSessionKey());{
wizard_session_key: 'FN9UYDbsLEuQI5zcR4HGeFYvRT6uHAMvuOgwdAKI',
transaction: '10001-xp-UBTe-9sZw'
}<head> section of your website. We strongly urge you to hotlink both files directly from our XS2A server. This will ensure you will always use the latest build.
<script src="https://api.xs2a.com/xs2a.js"></script><noscript>
<h2>Your browser does not support JavaScript.</h2>
Please deactivate JavaScript Blocker, AdBlocker etc. to use the service.
</noscript>
<div id="XS2A-Form" data-xs2a="<your-wizard-session-key-here>"></div>wizard_session_key from the response from step 1, start the session by using the key as described in step 3.
Save the transaction id from the response to get details about it later.
<noscript>
  <h2>Your browser does not support JavaScript.</h2>
  Please deactivate JavaScript Blocker, AdBlocker etc. to use the service.
</noscript>
<div id="XS2A-Form" data-xs2a="your-wizard-session-key-here"></div>

<script>
// Loads the styling of the library on which you can base your custom css on
xs2a.useBaseStyles();

xs2a.finish(function() {
	// Called when the session is finished
	document.location.href = 'your-success-link';
});

xs2a.abort(function() {
	// Called when the session is aborted
	document.location.href = 'your-abort-link';
});

// Start the wizard
xs2a.init();
</script>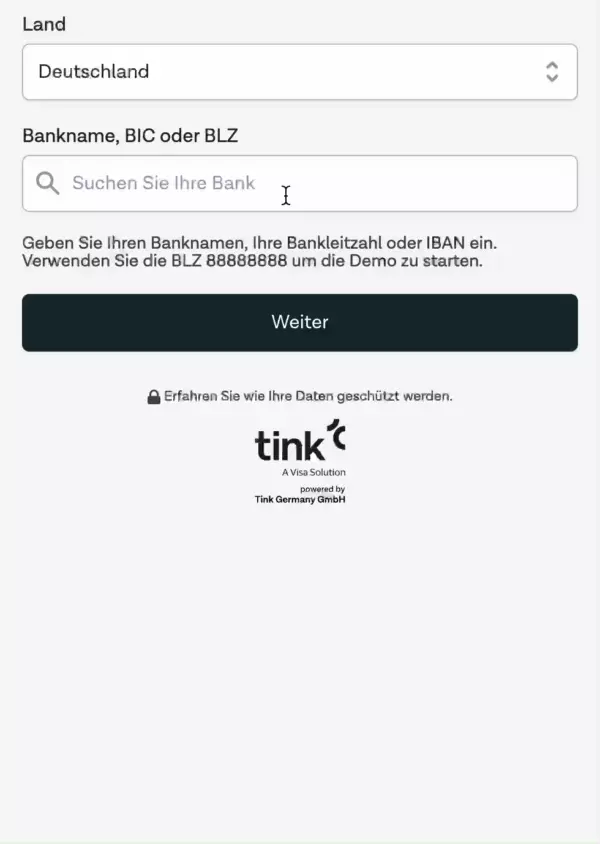
lost and received.
There are 2 different endpoints in place:https://api.xs2a.com/v1/payments/{transaction-id}/receivedhttps://api.xs2a.com/v1/payments/{transaction-id}/loss
XS2A.risk allows you to collect and validate a bank connection.
Additionally a range of predefined checks can be applied using the retrieved account information.
To use our API, make sure you have a Test-API key.
If you don't have one yet, you can grab one here.
xs2a_account_snapshot is used.
nategood/httpful. You have to execute composer require nategood/httpful before you are able to use it.
require 'vendor/autoload.php';

$apiKey = 'your-api-key';

$payload = [
	'xs2a_account_snapshot' => [
		'days' => 365,
	],
];

$response = \Httpful\Request::post('https://api.xs2a.com/v1/risks')
	->sendsJson()
	->authenticateWith('api', $apiKey)
	->body(json_encode($payload))
	->send();

echo $response->body->transaction;
echo $response->body->wizard_session_key;
npm i @fintecsystems/xs2a-node --saveconst { XS2A } = require('@fintecsystems/xs2a-node');
const xs2a = new XS2A('your-api-key');
try {
const { wizard_session_key } = await xs2a.Risk.create({
xs2a_account_snapshot: {
days: 365
}
});
// Use wizard_session_key as described in the next steps
} catch (e) {
// Handle errors ...
}
POST /v1/risks HTTP/1.1
Host: api.xs2a.com
Content-Type: application/json
Authorization: Basic base64("api:YOUR_API_KEY_GOES_HERE")
Cache-Control: no-cache

{
	"xs2a_account_snapshot":{
	"days":365
	}
}
// Create a RiskService Instance
RiskService riskService = new RiskService(apiKey);
// Build a Risk Request
Xs2aRisk risk = new Xs2aRisk();
Xs2aAccountSnapshot accountSnapShot = new Xs2aAccountSnapshot(
10,
LocalDate.parse("2021-01-01"),
LocalDate.parse("2021-01-10"),
List.of("income"),
true,
true
);
risk.setXs2aAccountSnapshot(accountSnapShot);
// add more risk checks as necessary ...
// Fire the request and get a response
WizardSessionResponse response = riskService.create(risk);{
wizard_session_key: '5m60tWWUZcT2lSTuZbZ7bRa8mJ3Axm8ki44HaBHV',
transaction: '10001-xr-L8Ub-keuK'
}<head> section of your website. We strongly urge you to hotlink both files directly from our XS2A server. This will ensure you will always use the latest build.
<script src="https://api.xs2a.com/xs2a.js"></script><noscript>
<h2>Your browser does not support JavaScript.</h2>
Please deactivate JavaScript Blocker, AdBlocker etc. to use the service.
</noscript>
<div id="XS2A-Form" data-xs2a="<your-wizard-session-key-here>"></div>wizard_session_key from the response from step 2, start the session by using the key as described in step 4.
Save the transaction id from the response to retrieve the results later.
<noscript>
  <h2>Your browser does not support JavaScript.</h2>
  Please deactivate JavaScript Blocker, AdBlocker etc. to use the service.
</noscript>
<div id="XS2A-Form" data-xs2a="5m60tWWUZcT2lSTuZbZ7bRa8mJ3Axm8ki44HaBHV"></div>

<script>
// Loads the styling of the library on which you can base your custom css on
xs2a.useBaseStyles();

xs2a.finish(function() {
	// Called when the session is finished
	document.location.href = 'your-success-link';
});

xs2a.abort(function() {
	// Called when the session is aborted
	document.location.href = 'your-abort-link';
});

// Start the wizard
xs2a.init();
</script>
transaction id from step 5 for retrieving them.
There are 3 different endpoints for retrieving results, depending on the checks you have requested:
GET /v1/risks/{transaction-id}/accountSnapshot?format=jsonxs2a_account_snapshot, you can retrieve the results for it
at this endpoint.
GET /v1/risks/{transaction-id}Here you can view the complete XS2A documentation in the Swagger format. It is also possible to generate a client from it using the Swagger file which you can download at the top of the documentation.
Talk to XS2A API from within your PHP environment.
Coming Soon
